In this guide we'll show you how to install your Personal Authentication Certificate into your Chrome browser.
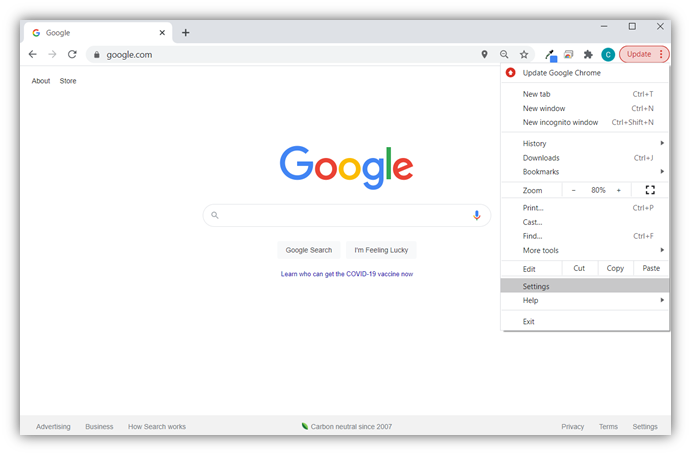
- What you’ll want to do first is select Settings from the Google Chrome settings menu. (This is the three dots that display in the upper-right hand corner of your browser window.)
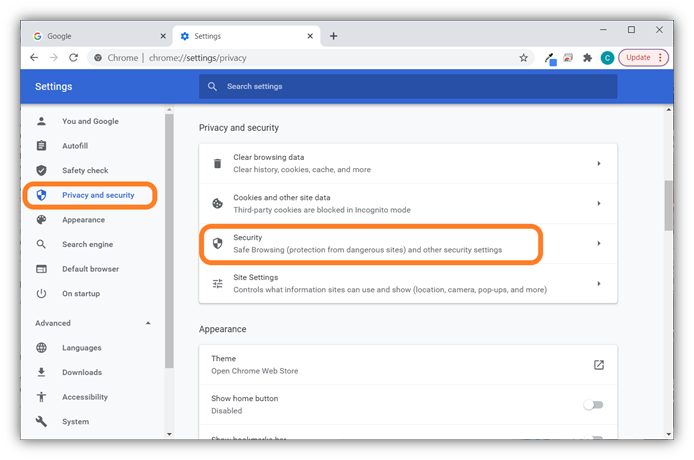
- In the window that pops up, select Privacy and Security in the left-hand navigation menu. This will bring up a list of four options in the main window. There, you’ll want to select Security.
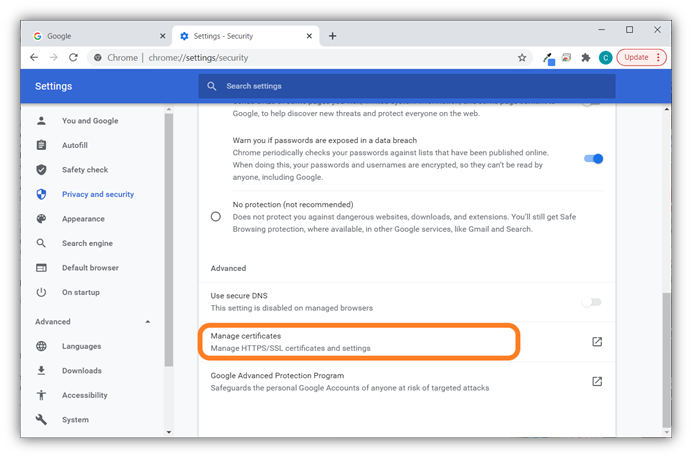
- In the Security window that results, scroll down to the Advanced section and select the Manage certificates option as shown below.
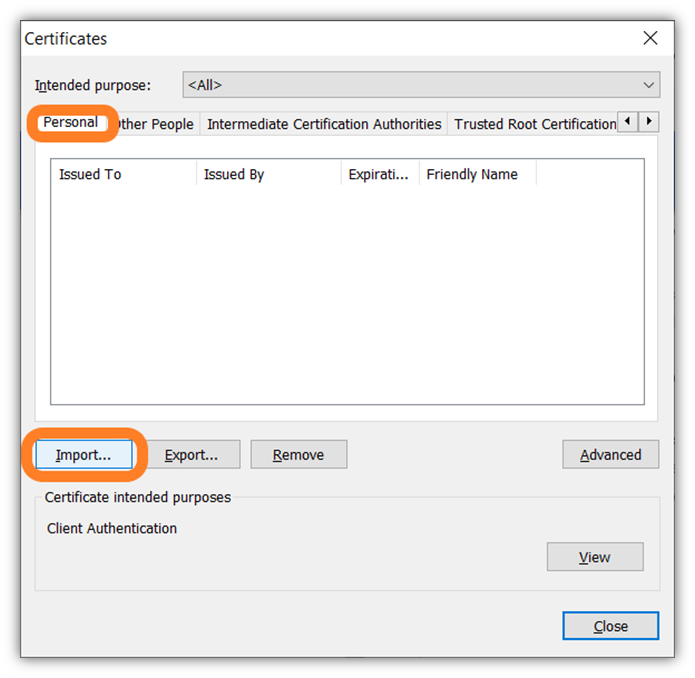
- A separate window will pop up labelled Certificates and you should be placed in the People tab automatically. (If not, select the People tab from the top navigation menu.) This is where any installed certificates you have will display. To move to the next step, select Import — this will launch the browser’s user-friendly Certificate Import Wizard.
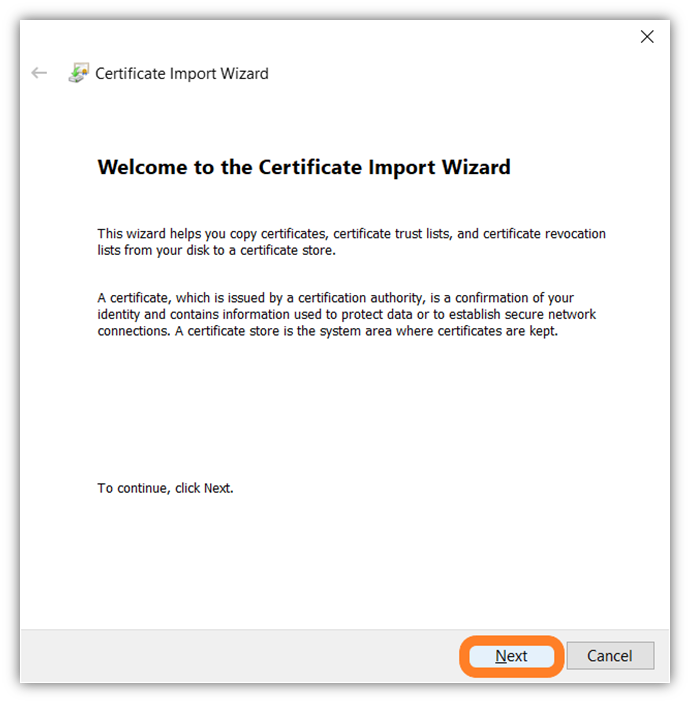
- In the Certificate Import Wizard, press Next to continue.
- To select the specific certificate file to upload, select the Browse button and navigate to where you have the certificate file saved on your desktop.
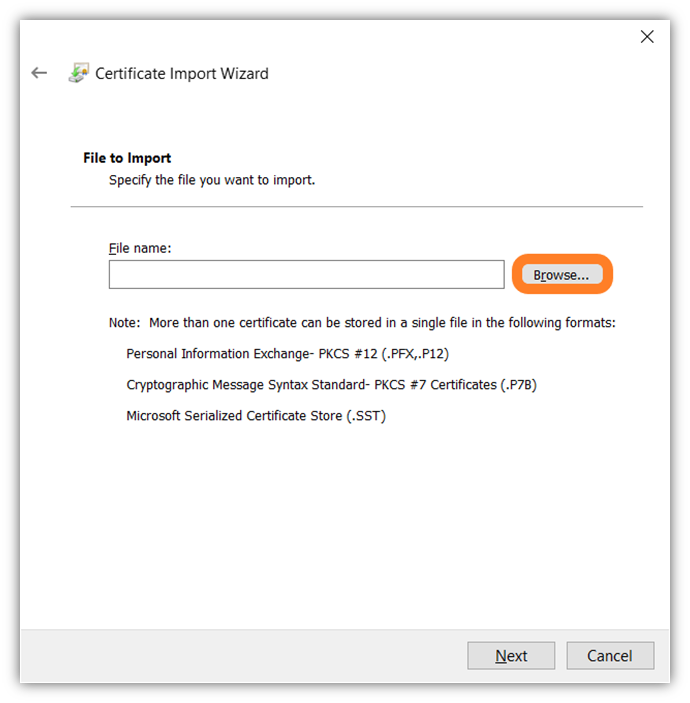
- To find the specific .pfx file more quickly (if you have a messy desktop like me), you can narrow down the browsing feature by extension type — in this case, you’ll want to select Personal Information Exchange (*.pfx, *.p12) to show only those types of files. Once you’ve selected the file, press the Okay button. (This will return you to the previous window but will have that file selected.)
- In the open window, press Next to keep the process moving.
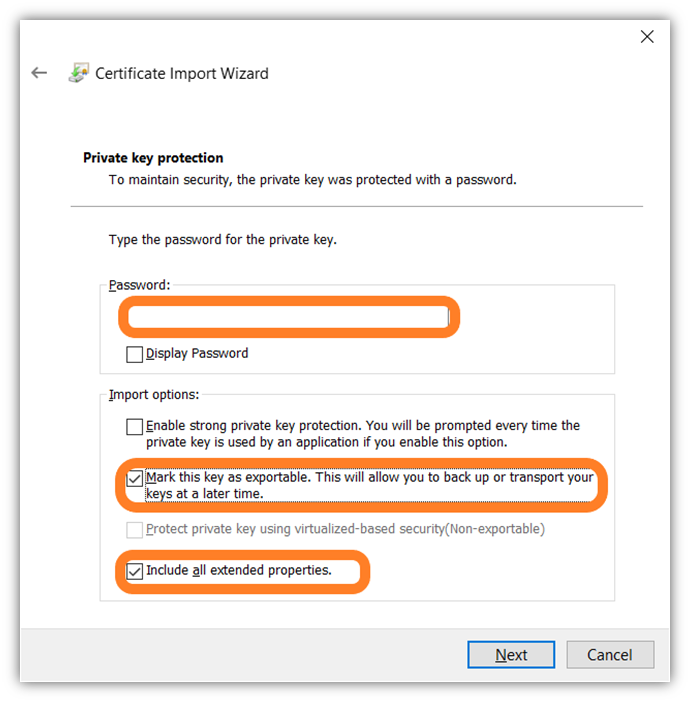
- Here, you’ll be asked to enter your private key password. This is the password you created during the certificate exportation process (i.e., when you downloaded the .pfx certificate file). After you enter that secret, you’ll must check the following options: Mark this key as exportable and Include all extended properties. When finished selecting these import options, press Next.
- This will complete the Certificate Import Wizard process. Boom! Of course, you’ll want to review and double-check your settings. If everything checks out, select Finish. If successful, you should receive a message indicating as much — just press Ok. If not, then you’ll want to retry the process.