It may happen that a customer (a web agency, a domain and hosting reseller or a webmaster) does not want to use your default nameservers, but wants to use his own, custom nameservers.
He can specify custom nameservers during checkout, but it's annoying, time-consuming and far from error-proof.
There's a way for the user to register his preferred custom nameserver in his profile, and have them automatically proposed during the domain registration process.
You need to configure your WHMCS by following steps:
- in Setup -> Custom Client Fields ( /admin/configcustomfields.php ) create five custom fields, named (i.e.) "First custom nameserver", "second custom nameserver", "Third custom nameserver", "Fourth custom nameserver", "Fifth custom nameserver"; all of them as "text box":
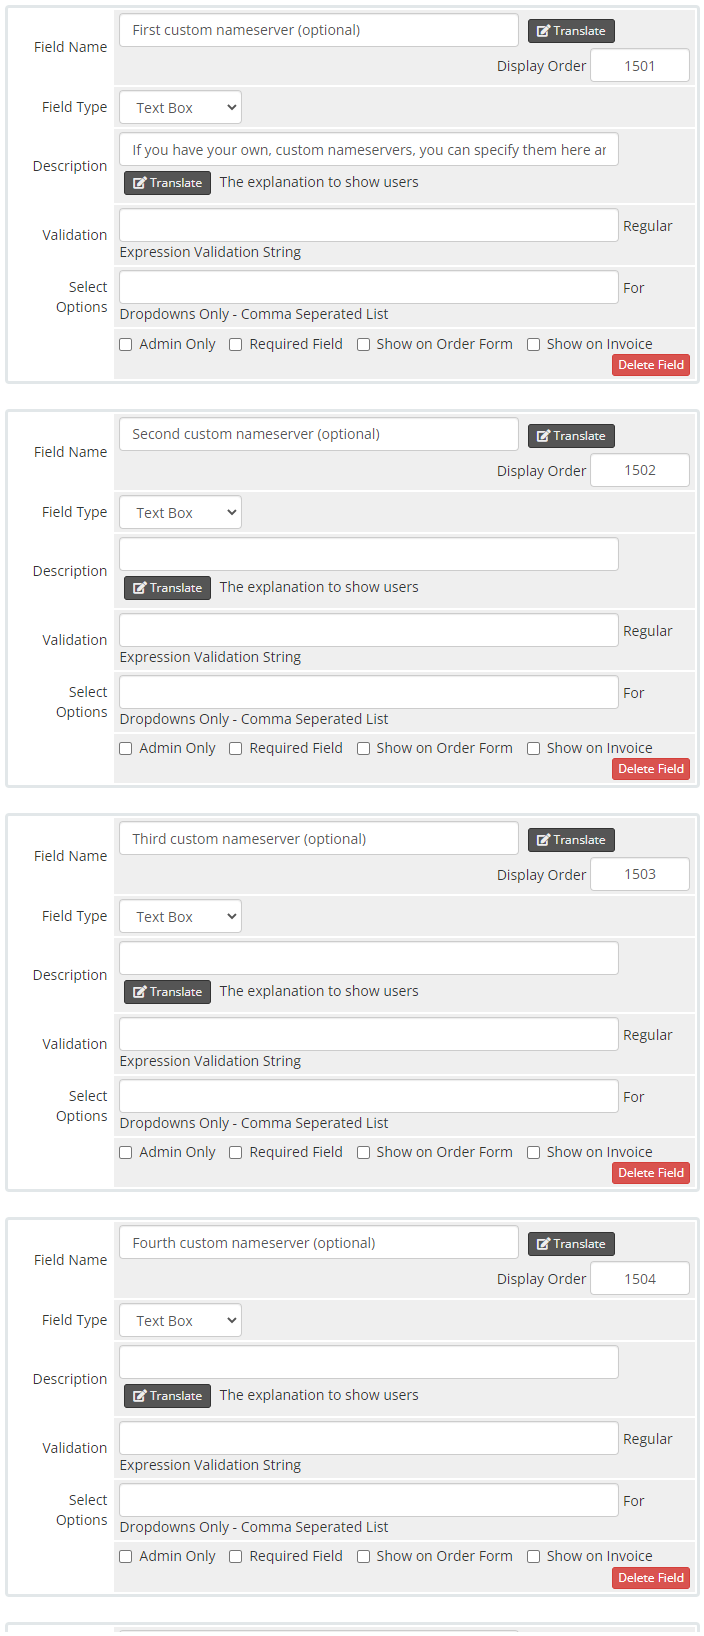
As "validation", you can insert following regular expression:^(([a-zA-Z0-9]|[a-zA-Z0-9][a-zA-Z0-9\-]*[a-zA-Z0-9])\.)*([A-Za-z0-9]|[A-Za-z0-9][A-Za-z0-9\-]*[A-Za-z0-9])$
that checks thas user inserted a valid hostname. - identify the ID of the Customs Fields you've just created
That's to say: any user custom field created in WHMCS is identified by a numeric, progressive ID, and is available in SMARTY environment as $clientsdetails.customfields1, $clientsdetails.customfields2, $clientsdetails.customfields3...
The easy way to identify it is by enabling Smarty debug mode and visiting any page in the client area.
In this example, we'll set our nameserver custom fields to be
$clientsdetails.customfields13
$clientsdetails.customfields14
$clientsdetails.customfields15
$clientsdetails.customfields16
$clientsdetails.customfields17 - edit the file configuredomains.tpl of your active order form (i.e. standard_cart)
- look for the following code in configuredomains.tpl:
<div class="row"><div class="col-sm-4"><div class="form-group"><label for="inputNs1">{$LANG.domainnameserver1}</label><input type="text" class="form-control" id="inputNs1" name="domainns1" value="{$domainns1}" /></div></div><div class="col-sm-4"><div class="form-group"><label for="inputNs2">{$LANG.domainnameserver2}</label><input type="text" class="form-control" id="inputNs2" name="domainns2" value="{$domainns2}" /></div></div><div class="col-sm-4"><div class="form-group"><label for="inputNs3">{$LANG.domainnameserver3}</label><input type="text" class="form-control" id="inputNs3" name="domainns3" value="{$domainns3}" /></div></div><div class="col-sm-4"><div class="form-group"><label for="inputNs1">{$LANG.domainnameserver4}</label><input type="text" class="form-control" id="inputNs4" name="domainns4" value="{$domainns4}" /></div></div><div class="col-sm-4"><div class="form-group"><label for="inputNs5">{$LANG.domainnameserver5}</label><input type="text" class="form-control" id="inputNs5" name="domainns5" value="{$domainns5}" /></div></div></div> - substitute it with the following code:
<div class="row"><div class="col-sm-4"><div class="form-group"><label for="inputNs1">{$LANG.domainnameserver1}</label><input type="text" class="form-control" id="inputNs1" name="domainns1" value="{if $clientsdetails.customfields13}{$clientsdetails.customfields13}{else}{$domainns1}{/if}" /></div></div><div class="col-sm-4"><div class="form-group"><label for="inputNs2">{$LANG.domainnameserver2}</label><input type="text" class="form-control" id="inputNs2" name="domainns2" value="{if $clientsdetails.customfields13}{$clientsdetails.customfields14}{else}{$domainns2}{/if}" /></div></div><div class="col-sm-4"><div class="form-group"><label for="inputNs3">{$LANG.domainnameserver3}</label><input type="text" class="form-control" id="inputNs3" name="domainns3" value="{if $clientsdetails.customfields13}{$clientsdetails.customfields15}{else}{$domainns3}{/if}" /></div></div><div class="col-sm-4"><div class="form-group"><label for="inputNs1">{$LANG.domainnameserver4}</label><input type="text" class="form-control" id="inputNs4" name="domainns4" value="{if $clientsdetails.customfields13}{$clientsdetails.customfields16}{else}{$domainns4}{/if}" /></div></div><div class="col-sm-4"><div class="form-group"><label for="inputNs5">{$LANG.domainnameserver5}</label><input type="text" class="form-control" id="inputNs5" name="domainns5" value="{if $clientsdetails.customfields13}{$clientsdetails.customfields17}{else}{$domainns5}{/if}" /></div></div></div>
(Warning: remember to modify $clientsdetails.customfieldsXX with the corresponding ID numbers of your WHMCS install!)
That's all: if any user of yours will configure custom nameservers in his client area, these nameservers will be automatically proposed to him for any new domain registration or transfer.